Python tutorials
The GRIT project is setup such that all binaries/executables are generated in the 'GRIT/bin' folder, this includes the dynamic library needed to run the Python interface. So when you want to run the example/tutorial code, you need to do so from the bin folder.
A 'Hello, world' example
As is traditional, we will start out with a 'Hallo, world' type of example. First, set up your imports.
Define a main function.
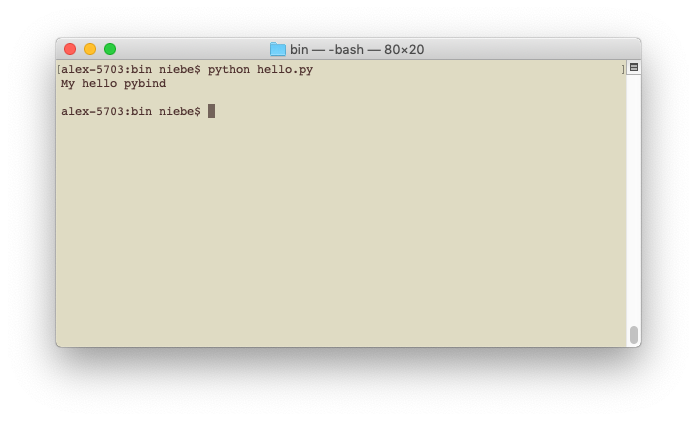
Save as 'hello.py' and run the script from the 'bin' folder using the command 'python hello.py'.
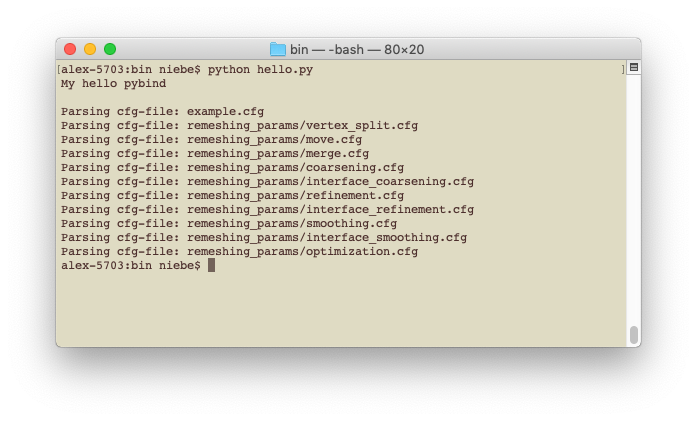
GRIT uses configuration files to pass arguments at runtime, so we start out by importing the settings given in 'example.cfg'.
The setting are loaded in to the 'ConfigFile' object, ready to be used.
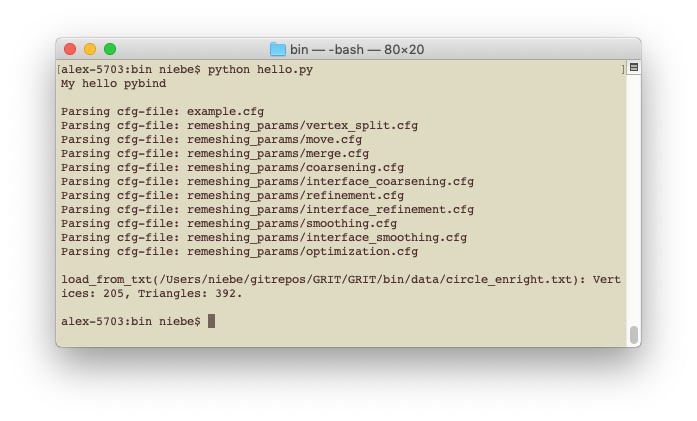
Extract filename from settings, and turn settings into parameters.
Now we have what we need to initialize a GRIT engine.
A quick look at the output, reveals - as is often the case with 'Hello, world' type examples - at first glance a rather boring result. However, if you get this to work, you are well on your way to making your own GRIT simulations.
Vortex in a box
In its simplest form, a GRIT simulation can be described as a four step process:
- Initialize system
- Do simulation step
- Update the engine
- Write simulation result
Initialize
As in the 'Hello, world' example, we start with importing the libraries we need and setting up the variables used to initialize a GRIT engine.
Simulation step
The simulation step is where the real work is done, let's put that in a separate function to keep the 'main' function clean. The simulation step function takes the engine and the settings object as input. First, all necessary information is extracted from the engine object; the number of vertices in the mesh and the vertices of the mesh. A time step - dt - is set, and a copy of the vertices is made.Next, we add a velocity to the vertices to update their positions and return to the main function.
Back in the main function, we loop over the number of steps given by the configuration file. Each iteration of the loop repeats steps 2-4, where 'engine.update(parameters)' is the call to GRIT where all the magic happens.
All that is left to do, is to somehow record the simulation results. In this example - and in the demos in the repository - we write the results to an .svg file using the function 'write_svg_files'. GRIT is not a realtime simulation tool, and so it makes more sense to save the results as files rather than visualizing each frame when it is computed. The implementation of 'write_svg_files' is simple.
The full example can be found in the GitHub repository (see 'Download') or here as a .zip file.
 This project has received funding from the European Union's Horizon 2020 research and innovation programme under the Marie Sklodowska-Curie grant agreement No. 764644. This website only contains the RAINBOW consortium's views and the Research Executive Agency and the Commission are not responsible for any use that may be made of the information it contains.